I have a few private Github repositories where I use Travis for running checks on each of my commits. A couple of days ago I received a message from Travis telling me that I only had 10 builds left as part of my trial. Luckily, someone told me CircleCI allows unlimited private builds for free, so I’m going to try it out.
Creating an account
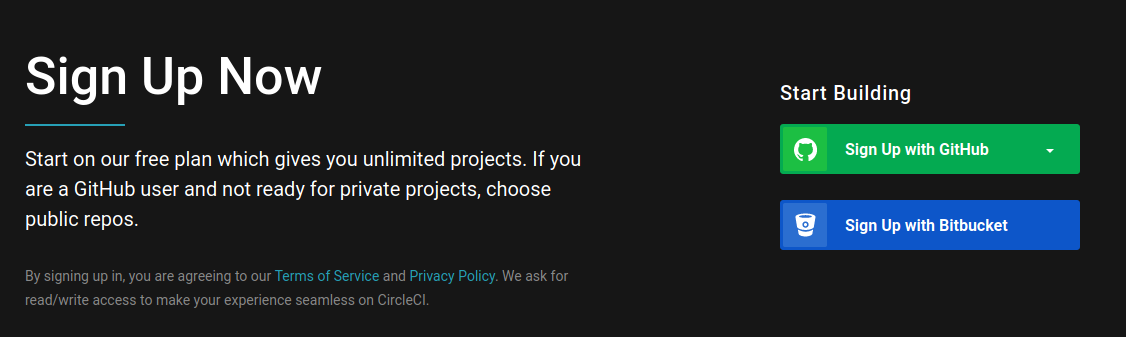
The first step is to create an account. They allow to sign up with Github, so I just chose that option:
Build config file
The next step is to create the build config file. Inside the repo, run these commands:
1
2
mkdir .circleci/
touch .circleci/config.yml
Adding build commands
The next thing we want to do is create a job and add a build command to it. I usually create a script with all the steps I want to do as part of my build and just call that file:
1
2
3
4
5
6
7
8
9
version: 2.1

jobs:
  build:
    machine:
      image: ubuntu-1604:201903-01
    steps:
      - checkout
      - run: sh scripts/publish.sh
Notice that the code is not checked out automatically. We need to do it as one of our steps. We also need to specify the environment where our build will run. I decided to run my publish.sh script in an ubuntu machine. The documentation explains the different executors that can be used.
Choosing branches
Currently my build step takes care of creating a publishing artifacts as well as running checks. For that reason, I prefer to only build the master branch. Configuration file version 2.1 forces us to create a workflow. Let’s create one:
1
2
3
4
5
6
7
8
9
10
11
12
13
14
15
16
17
18
version: 2.1

jobs:
  build:
    machine:
      image: ubuntu-1604:201903-01
    steps:
      - checkout
      - run: sh scripts/publish.sh

workflows:
  version: 2
  push_and_publish:
    jobs:
      - build:
          filters:
            branches:
              only: master
A workflow is a set of build steps that can be executed sequentially or in parallel as part of your build. For example, you might want to build your package and run the linter in parallel, then run your tests, and finally publish your artifacts.
In this scenario, I’m not taking advantage of the workflows, I’m just creating it, because that’s the only way to specify that I only want to run my build for the master branch. The workflow is called push_and_publish and it will run the build job (defined in the jobs section of the configuration file). I make use of filters to specify that only master branch should be built.
Environment variables and secrets
It is common that some private information is needed in order to execute some of the build steps. In my case, I want to create a docker image and publish the image to a docker registry. I don’t want the credentials to the docker registry to be checked into the code repository, so I want a way to inject them to the CircleCI build before it runs.
We can set up environment variables by going to the settings of the project and choosing the Environment variables option:

Since I usually create a docker image and push it to a registry, I add here a key that would allow the system to push to the registry.
Pushing back to Github
Something else I do as part of my build is tag the commit that was built with the version of the artifact that was generated. To do this, CircleCI needs push permissions to the repo, which it doesn’t have by default.
When we start using CircleCI for building a Github repo, it creates a new read-only key. To be able to push, we need a read-write key. To create a key, we can use these commands:
1
2
openssl genrsa -out ~/.ssh/circleci 2048
ssh-keygen -y -f ~/.ssh/circleci > ~/.ssh/circleci.pub
Then, we need to add this as a Deploy key for the repo. This can be done from Github, in the repository settings:

When prompted, enter the public key.
The private key needs to be added to CircleCI. This can be done from SSH Permissions within the project settings:

When prompted, enter github.com as hostname and the private key.
We also need to add a step to our build to register our ssh key. This is how my final config.yml looks like:
1
2
3
4
5
6
7
8
9
10
11
12
13
14
15
16
17
18
19
20
21
version: 2.1

jobs:
  build:
    machine:
      image: ubuntu-1604:201903-01
    steps:
      - add_ssh_keys:
          fingerprints:
            - "d5:86:ca:bd:62:d5:48:8c:bc:76:77:c9:8c:43:89:89"
      - checkout
      - run: sh scripts/publish.sh

workflows:
  version: 2
  push_and_publish:
    jobs:
      - build:
          filters:
            branches:
              only: master
The last step is just committing this file and pushing it.
automation testing