For those of you who don’t know, Jenkins is an application that allows you to create a Continuous Integration environment for your software projects. Most of the time it is used to periodically run test and build your project in an environment that should be similar to your production environment.
Installation
To install Jenkins on a Debian based system you only need to use:
1
sudo apt-get install jenkins
This command will install it and will automatically start it as a service. This service will be started automatically every time your system is restarted.
If you are using another OS you can download a war file from Jenkins main site and run it using:
1
java -jar jenkins.war
To see your instance of Jenkins running you can visit http://localhost:8080
Security
By default anyone will be able to access Jenkins and create and modify any jobs. This is probably not something you want if you are going to make your instance available on the Internet.
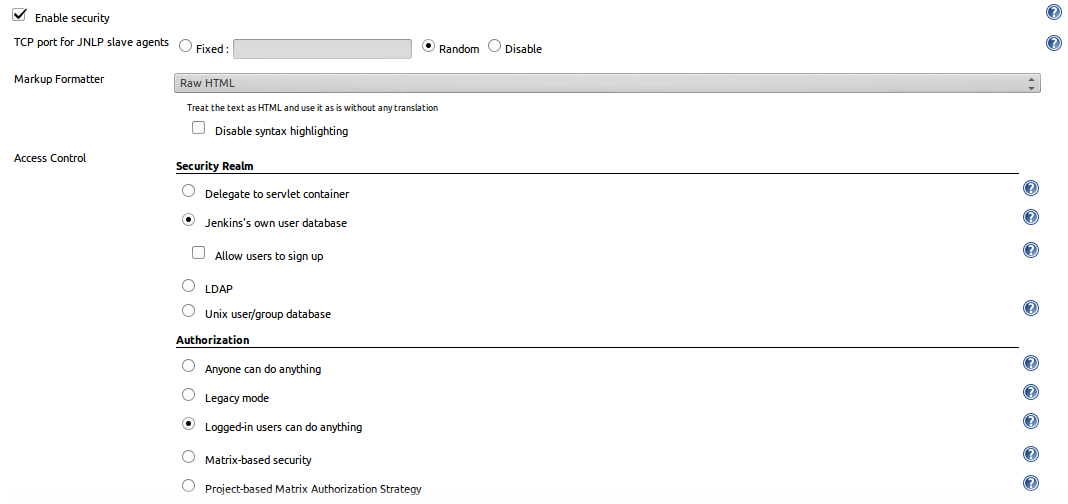
To modify the security settings go to http://localhost:8080/configure and check the Enable security checkbox. On the Access Control section select Jenkins’s own user database and Logged-in users can do anything, then click Save.
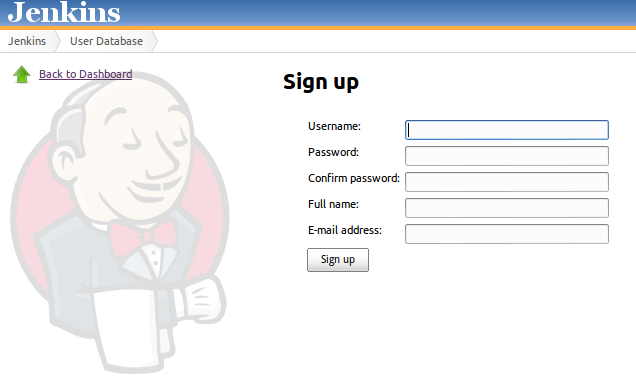
You will immediately get a form to create your first user. Fill all the information and click Sign Up
Now you have an authenticated user that can securely create and modify jobs.
Creating a job
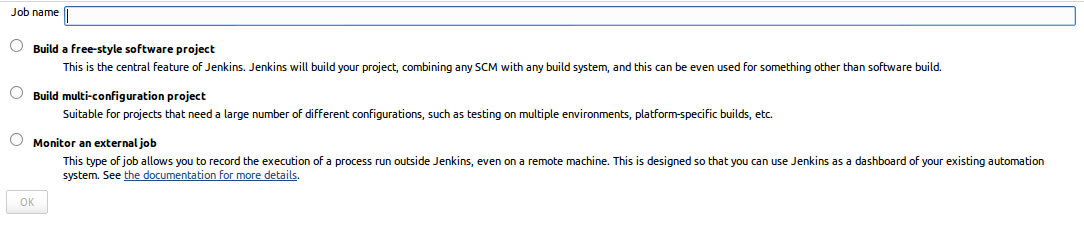
Now it’s time to get to the interesting part. To create a new job click on the New Job button on the left menu of the main page. You will get to a form where you can enter a name for your Job and choose the type of project you want to create. I will select Build a free-style software project.
Then you will be taken to a job configuration form. The most important fields here are:
Discard Old Builds.- You probably don’t want to keep builds forever so you can choose this option and select how many builds you want to store before you start deleting old ones.
Build periodically.- You can schedule your job to run periodically using the crontab format. For example if you wanted your job to run every 6 hours you would write this on the field: 0 */6 * * *
Add build step.- Finally you can define a script that you want your build to run. This can be basically any bash script.
I created a bash script that will clone one of my open source projects if it is not already on the workspace and if it is there it will pull latest changes:
1
2
3
4
5
6
7
if [ ! -d "poMMo" ]; then
  git clone git://github.com/soonick/poMMo.git
fi

cd poMMo
git fetch origin master
git checkout master
You can as easily modify this with any command that can run in the context of a shell.
You can start your job by clicking the Build now button on the left of your job screen. When the job is ran it will execute this script from within the workspace folder of your current job, in my case /var/lib/jenkins/jobs/Pommo/workspace. Note that this folder won’t be cleaned after the job is finished, that is the reason I check for the existence of the poMMo folder on my script, if the job was run before it will already be there and I just need to get the latest changes for my repository.
You can see the specific console output for each of the builds you trigger, by clicking on the specific build and then clicking on Console output. The logs are also stored on your Jenkins folder, in my case /var/lib/jenkins/jobs/Pommo/builds.
automation testing