I’m working with a small team that is divided in two geographical locations. This separation has made collaboration a little challenging which has compromised the quality of the code base. I’m exploring tools that can help us collaborate better, particularly making it easy to review each others code.
Gerrit promises a platform that makes it possible to create ACLs on top of git repositories, so that code can’t be committed until an official approver checks and approves the code. Ideally, the workflow will look something like this:
- Carlos makes changes and commits them to his local repository
- Carlos pushes his changes to Gerrit and creates a code review
- Luis, as an owner of the project reviews the code and suggests changes
- Carlos makes the changes, commits them and updates the code review
- Luis looks at the changes and approves them
- Carlos can now push the changes to upstream
Things of interest here are:
- Carlos can’t push to upstream until a project owner approves the code
- Luis can approve the code after all changes have been made
- After code is approved it can be pushed upstream
Configuring Gerrit
Gerrit is a complex system and documentation doesn’t make things much easier. Since I’m going to be making a lot of mistakes in the process, and because once I have something working I want to be able to replicate it, I’m going to use Docker. Gerritforge, the company behind Gerrit, released a basic Docker image with instructions to use it and extend it. I’m going to try to use this image to create a system that fits my needs:
- A Gerrit administrator that can manage users
- A git project
- An owner for the project
- A developer for the project
Lets start with the simplest system:
1
2
3
4
5
6
7
FROM gerritforge/gerrit-centos7:2.11.4

# Expose gerrit ports
EXPOSE 29418 8080

# Start Gerrit
CMD /var/gerrit/bin/gerrit.sh start && tail -f /var/gerrit/logs/error_log
You can put this docker file in a folder and build it using:
1
docker build .
And then run it:
1
docker run -p 8080:8080 -p 29418:29418 <image_id>
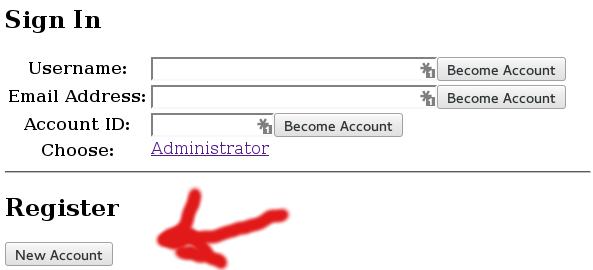
Once the image is running, you can point your browser to http://localhost:8080 and you will see your first Gerrit screen. At this point there is not any security set up into the system. You can click Become in the top right corner and then choose the Administrator user and you will become the administrator of the system. This is of course not safe for production, but we are going to use it to test some features. Lets create our users: Carlos, the developer and Luis the approver.
Sign out from the Administrator user click become, and then click on the New account register button.

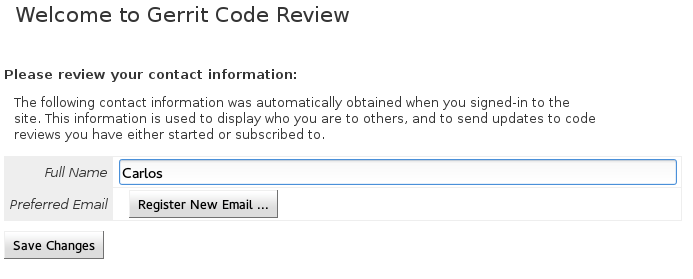
When you are done, you will see the new created users in the Become screen:
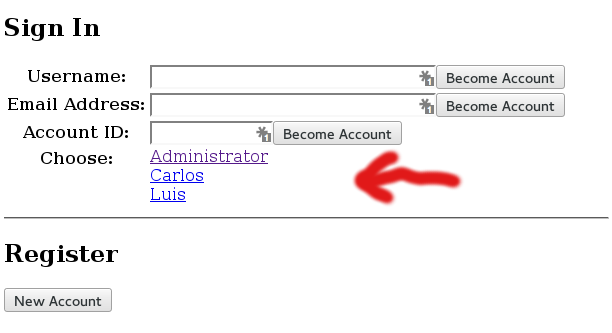
All the newly created users have the same permissions as an anonymous user, which by default is read-only access to any repository. We will leave them like this while we create our new project:
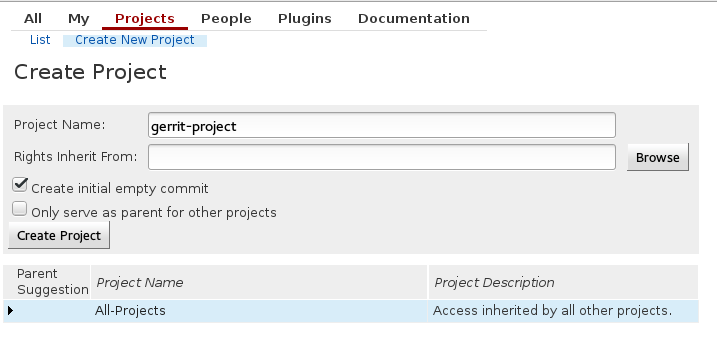
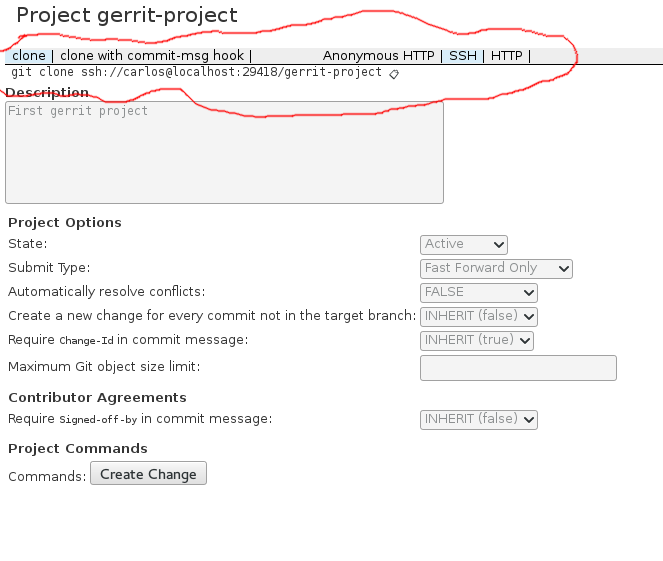
After creating the project we will be asked to configure some things about it. I consider the most important to be Submit Type and Require Change-Id in commit message. I set Submit Type to Fast Forward Only, which means that Gerrit will only integrate the commit if it is a fast forward from the current state of the destination branch. Gerrit won’t attempt to merge or rebase any changes, all merges and rebases must be done by the developers. A change-id is used to identify commits that belong to the same code review even across merges and rebases.
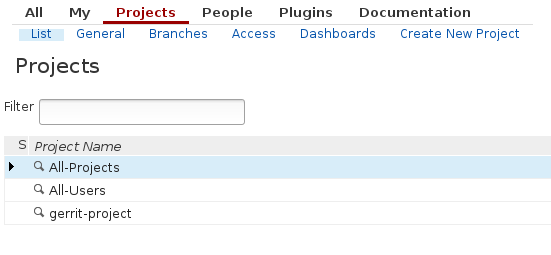
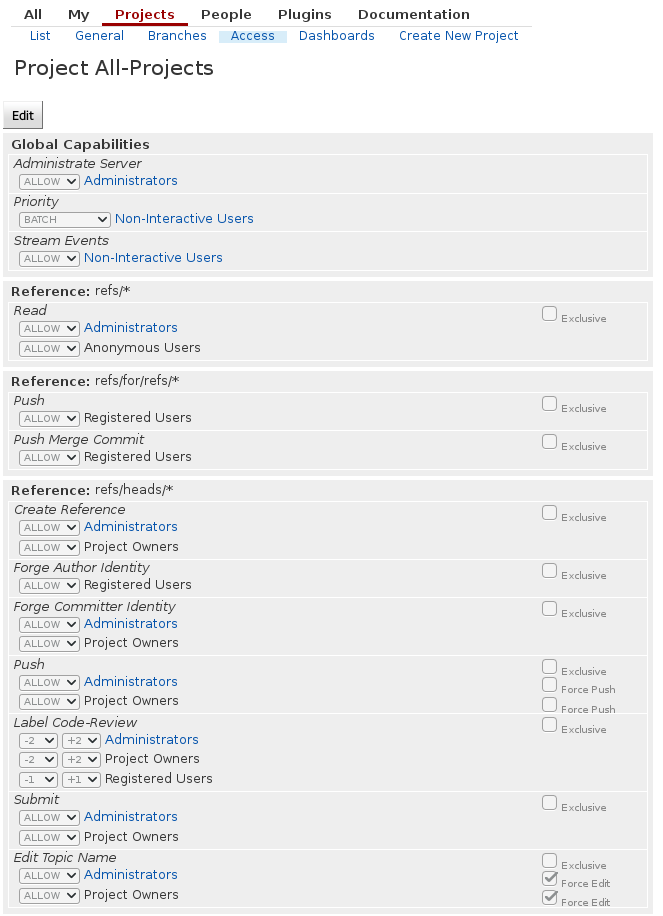
When setting up Gerrit for a private project, you don’t want anonymous users to be able to see your repos, so lets fix this. Start by logging in as the Administrator, listing the projects and going to All-projects. Once there, edit the permissions and remove all permissions given to anonymous and registered users.
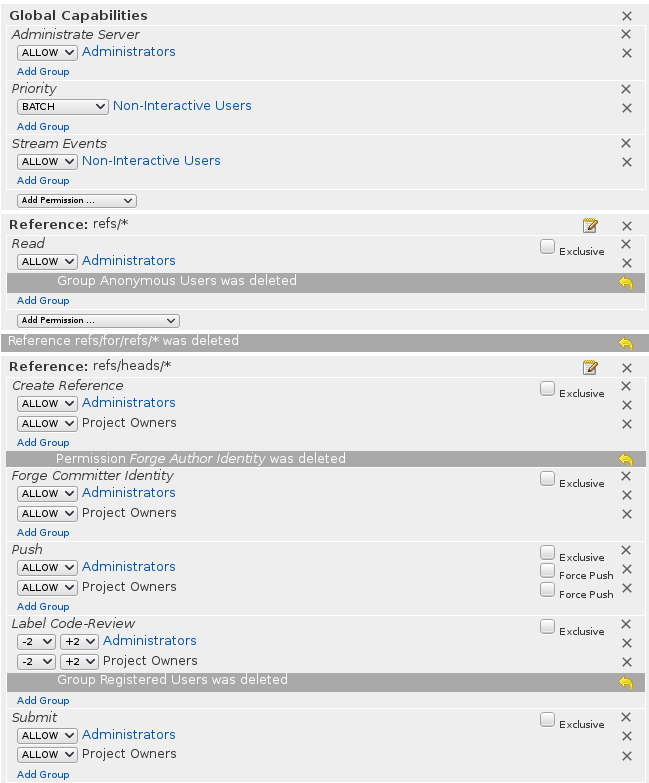
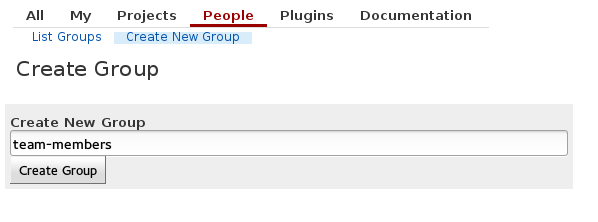
After clicking save you can try logging in as another user and notice that you won’t be able so see anything. This is closer to the behavior we want. Now, we actually trust Luis and Carlos to see our repos, so lets give them access. We start by creating a group and adding them to that group:
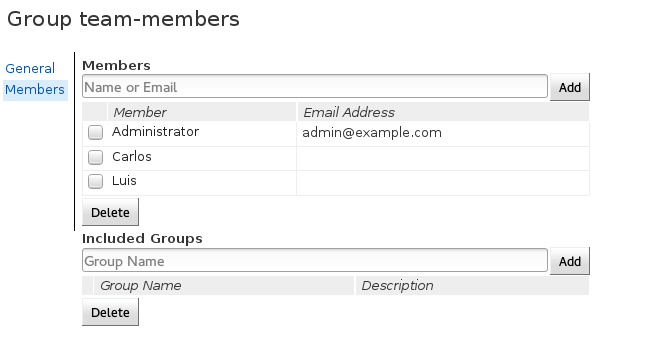
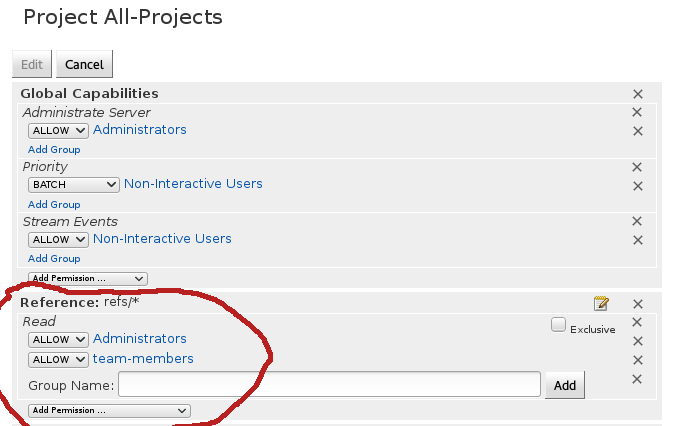
Now, we have to go back to All-projects permissions and add read access to all team-members:
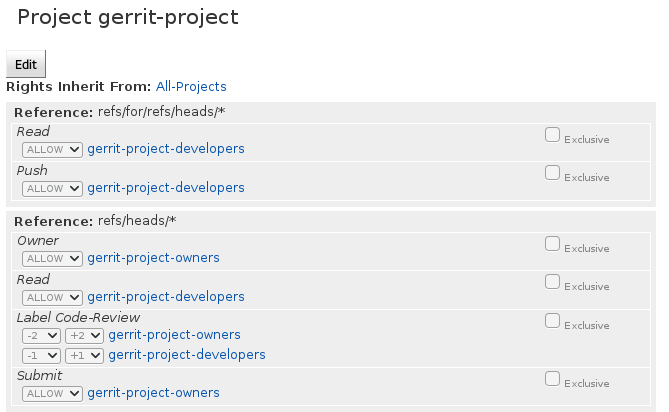
We want Luis to be an owner of gerrit-project. To do so, we have to create a gerrit-project-owners group, add Luis to that project and add that group as an owner of the project. We also want Carlos to be able to create code reviews and comment on other code reviews, but not be able to approve them. For this we need another group. We will call it gerrit-project-developers. This is how the final permissions would look like
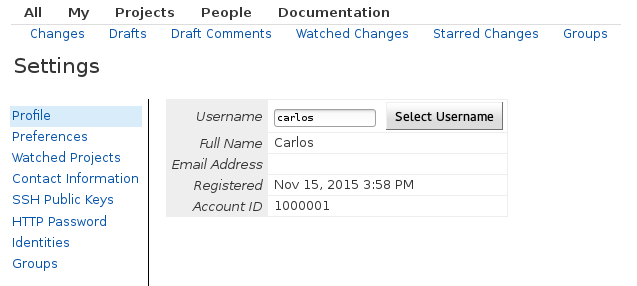
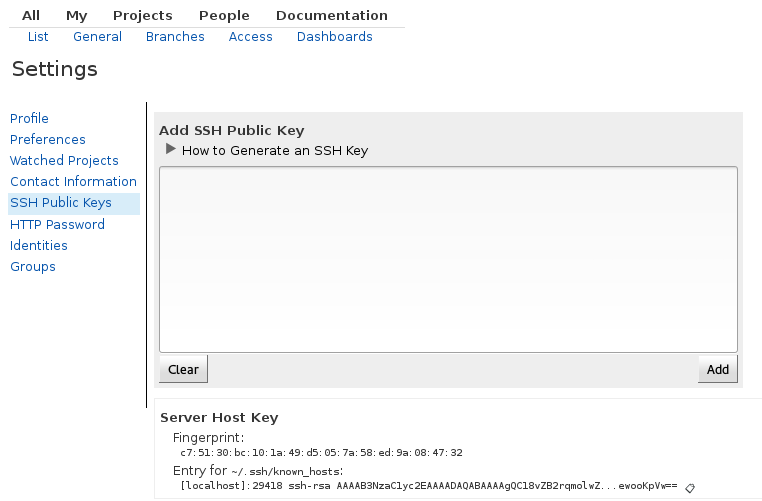
Before a user can clone the project in a read-write mode, they first need to register a username, an email address and a public SSH key. Once that is done, you will have access to the clone URL in the project:

We are finally ready to write some code(or at least some changes in a git repo). Clone the repo and make some changes. Since we added a Change-Id restriction on the repo, the change won’t be accepted without this id. For now, we can add it manually to the commit message. Just grab the commit hash and add an I(uppercase i) at the beginning. An example commit message looks like this:
1
2
3
Add new file with some text

Change-Id: I6ea4b0863a655f321b7fc6eb3bb784dbd8cf25c8
Now, you can push a code review, but the command is a little different than a normal push:
1
git push origin HEAD:refs/for/master
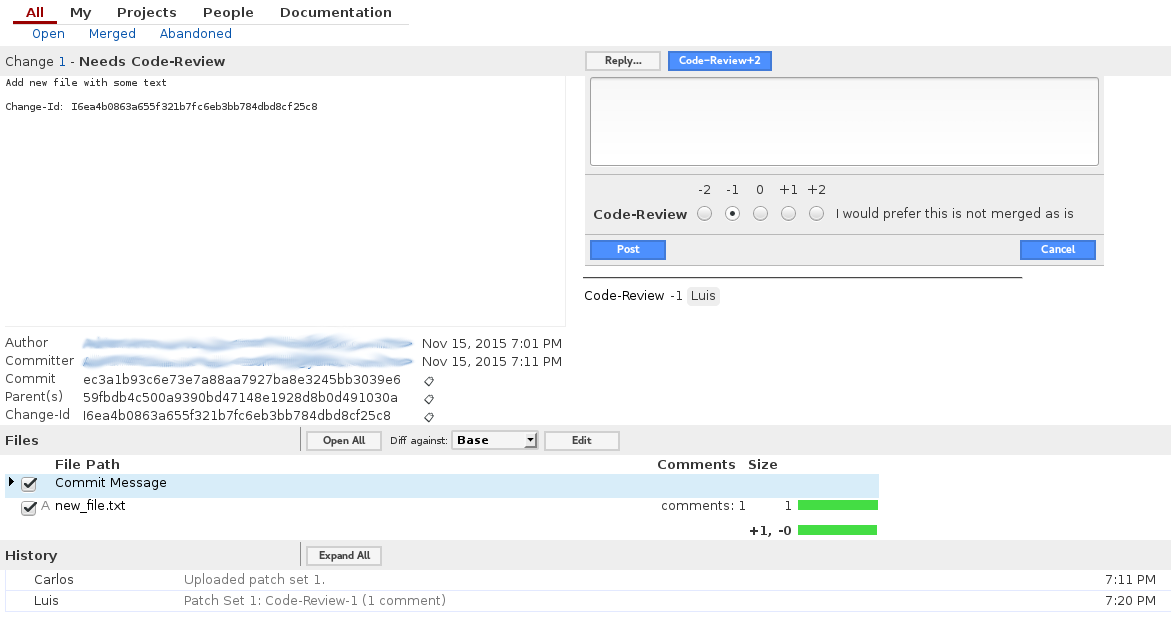
Now, you can log in as Luis and see the change:

Luis can now leave comments on the code and choose not to accept-it at the moment:
Carlos fixes the code based on the comments and the amends the fixes to the previous commit. He goes ahead an pushes again:
1
git push origin HEAD:refs/for/master
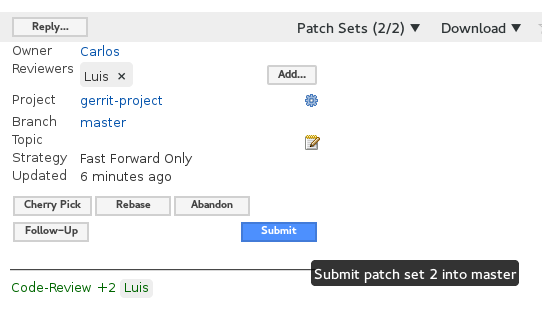
If Luis likes the changes he can go ahead and give him a +2. If not, he can leave more comments until he feels satisfied. Once a +2 is given a submit option will appear. Luis can click that button and the commit will be automatically added to master (as a fast-forward merge since we specified it in the project configuration).
So far it looks like Gerrit can provide a trunk model flow with git. There are still a lot of reasons why I can’t use it in production yet. First, there is currently no authentication, which makes it completely insecure. All the configuration we did is stored in a DB inside the container, ideally we would have everything in an external DB. The git repos are also being stored inside the container, which means that killing the container would kill the repos, ideally we have them in a place that doesn’t die with the container. Also, Gerrit has a verification option that can check that a code review passes all tests before it can be pushed.
There are probably some other things I am missing, but I’ll cover them in other posts. For now, this seems like a good introduction to what Gerrit can do for a git project.
git linux productivity