In a previous post I explored using Bitbucket Pipelines to generate and publish Docker images for my projects. I was worried I would reach the 50 minutes limit pretty quickly, but even before I reached it I ran into other issues that made me look for other options. Namely, you can’t use docker-compose or the docker run command in Pipelines.
While looking for other options I found GitLab. I had heard a lot of things about GitLab in the past, especially about their very advanced deployment pipelines capability. One thing that I didn’t know, which makes me very happy, is that they have a free tier that includes 2,000 minutes of CI per month (Around 1 hour per day). This number should be more than enough for my personal project needs.
Getting started
The first thing you need to do is create an account. This can be as easy as signing in with Google or Github. The next step is to create a project. One of the options provided is importing your project from Github or Bitbucket, which makes this step really easy.
Interestingly, GitLab imports everything about the project, which suggests they want you to use them for git hosting too and move away from Bitbucket. This actually sounds a lot easier than having a hook that notifies GitLab for every commit on Bitbucket, so I’m going to try this approach for now (If it is good, I’ll eventually move all my projects to GitLab since Bitbucket wouldn’t have anything to offer).
Using GitLab as origin
Since I’m moving this project from Bitbucket to GitLab, I need to do a couple of things:
- Add my SSH key to GitLab
- Change my repository origin to point to GitLab
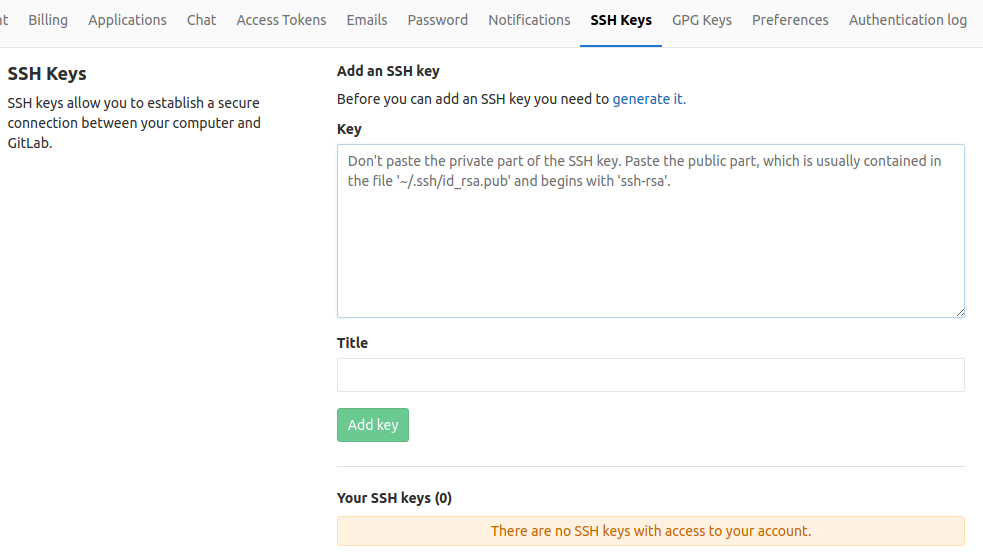
The process to add an SSH to GitLab key is very similar as with Github or Bitbucket. You just need to generate an SSH key and add the public key to your profile:
To change your origin, you can use this command:
1
git remote set-url origin git@gitlab.com:my.name/project-name.git
Creating a pipeline
The next step is to create a pipeline. This was actually a lot harder than I expected, but at the end I was able to do everything I wanted. Everything starts with a .gitlab-ci.yml file in our repo. My file ended up looking like this:
1
2
3
4
5
6
7
8
9
10
11
12
13
14
15
16
17
18
19
20
21
22
23
24
25
26
27
28
29
30
31
32
# Use the docker image because we need the docker command in publish.sh
image: docker:latest

# Start the docker service. Dind stands for Docker in Docker. GitLab workers are
# Docker containers, so we are actually running Docker inside a Docker container
services:
- docker:dind

before_script:
  # We need openssh to add our private key to our keystore (We need to add our
  # private key to our keystore so we can push to the git repo)
  # bash is needed so we can use the <( syntax that prevents us from printing
  # the private key when we use ssh-add
  # git and make are used in publish.sh
  - apk update && apk add openssh bash git make
  - eval $(ssh-agent -s)

  # Add the SSH key stored in SSH_PRIVATE_KEY variable to the agent store
  - bash -c "ssh-add <(echo '$SSH_PRIVATE_KEY')"

  # For Docker builds disable host key checking. Be aware that by adding that
  # you are suspectible to man-in-the-middle attacks.
  - mkdir -p ~/.ssh
  - '[[ -f /.dockerenv ]] && echo -e "Host *\n\tStrictHostKeyChecking no\n\n" > ~/.ssh/config'

# Name of the job. This can be anything
publish:
  # Only pushes to the master branch will trigger a build
  only:
   - master
  script:
   - sh scripts/publish.sh
I added comments to the file so it is easy to understand what each part does. I had to modify my publish.sh file from my Bitbucket Pipelines article. Now it looks like this:
1
2
3
4
5
6
7
8
9
10
11
12
13
14
15
16
17
18
19
20
21
22
23
24
25
26
27
28
29
# Exit if there is any error
set -e
# Echo commands
set -x

# Constants
PROJECT='my-project'
REGISTRY_URL='cloud.canister.io:5000'

# Calculate next consecutive tag number (1, 2, 3 ...)
LAST_TAG=$(git describe --tags $(git rev-list --tags --max-count=1))
NEW_TAG=$((LAST_TAG + 1))

# Set the git user to the user that pushed the commit and set the origin
git config --global user.email $(git --no-pager show -s --format='%ae' HEAD)
git config --global user.name "$(git --no-pager show -s --format='%an' HEAD)"
git remote set-url --push origin git@gitlab.com:my.name/${PROJECT}.git

# Tag and push the tag
git tag $NEW_TAG
git push origin $NEW_TAG

# Build docker image
make build-prod

# Publish docker image
docker login --username=$REGISTRY_USERNAME --password=$REGISTRY_PASSWORD $REGISTRY_URL
docker tag "${PROJECT}-image-prod" "$REGISTRY_URL/$REGISTRY_USERNAME/$PROJECT:$NEW_TAG"
docker push "$REGISTRY_URL/$REGISTRY_USERNAME/$PROJECT:$NEW_TAG"
Adding deploy key to worker
Since my script requires the worker running my job to push a tag to my repository, I need to give an SSH key to the worker so it can do this. The process for doing this was a little harder than I expected.
First I had to generate a public-private key pair.
Then I needed to add the generated private key as a secret variable on my project’s pipeline settings:
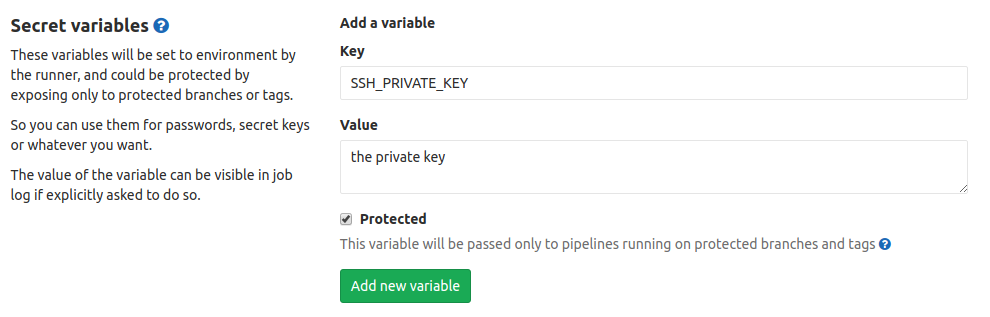
Protected variables are only passed to protected branches, so I had to make sure my master branch was protected. While I was here I also added my credentials for Canister (REGISTRY_USERNAME and REGISTRY_PASSWORD).
In my .gitlab-ci.yml you can see how the SSH key is being added to the worker:
1
bash -c "ssh-add <(echo '$SSH_PRIVATE_KEY')"
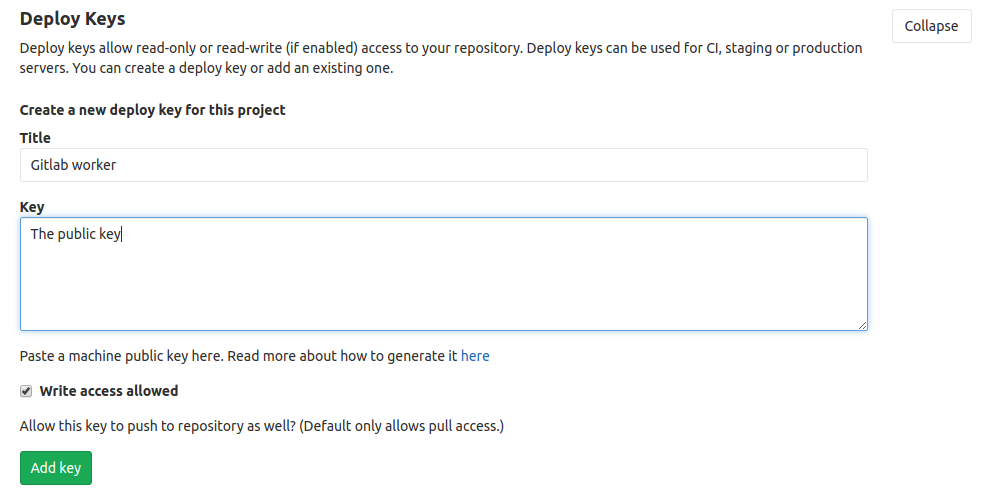
Now we need to tell Gitlab that this key is allowed to push to our repo. We can do this by adding the public key as a deploy key. This can be done from the Deploy keys section in the repository settings:
Finally, every commit pushed to master will generate a Docker image that will be published to Canister.
automation docker productivity